
Word with Screen Reader: Font Selection
Hello, my name is Vikki Vaughan. Today, we'll examine using shortcut commands to customize font within a Microsoft Word document. Our task will include selecting text, and customizing font type, size, and color.
When we discuss font in a Word document we are referring to the graphical representation of text which includes its unique type, point size and color. There are many different varieties in text design. These variations are grouped into what's referred to as typeface families.
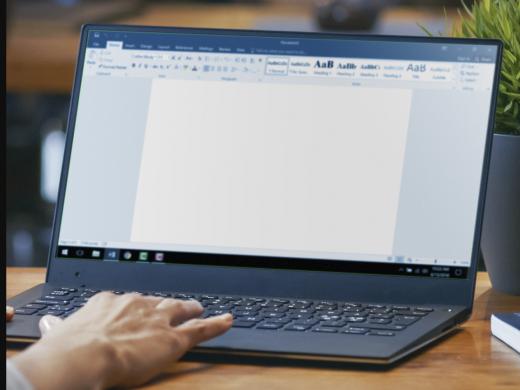
For example, Arial is a typeface family. Arial Narrow is a typeface. And Arial Narrow Italic, 10 point, is a font. Adjusting the type, color, and size of the font is one of the most common formatting changes we make in Word documents. Let's begin with the font type. The keyboard shortcut to select a font type is Ctrl + D. I'll demonstrate in this blank Word document. When we press Ctrl + D, a font dialogue box comes up and the focus is on a combo box with a list of all of the available fonts for this application.
Screen Reader: Font dialogue, font color effects, this is a true type font. This font will be used on both printer and screen. Font, edit Alt + F, selected Arial.
Vikki: The default font is highlighted in the edit field. At this point we have several choices. We can enter the name of the desired font, also called typeface. Or we can use our arrow keys to make a selection. Our default font type, in this document, is Arial. But let's say we wish to select Calibri. We can type in the first few letters of the font type such as C-A-L-I, and this shifts our list to the fonts that begin with the letter C.
Screen Reader: C, A, L, I.
Vikki: We then press the down arrow key to move into our list, and select Calibri font.
Screen Reader: Calibri.
Vikki: We press Enter to select. All text that I enter going forth will now be in Calibri text until I make a different selection. I'll demonstrate by typing the name of our newly selected font.
Screen Reader: C, A, L, I, B, R, I, Calibri.
Vikki: We can also select text and change the font in an existing document. Let's try that with the "Declaration of Independence." I'll begin by selecting all of the text with Ctrl + A.
Screen Reader: 9,109 characters selected.
Vikki: Then I'll bring up our font dialogue box with Ctrl + D.
Screen Reader: Font dialogue, font color effects. Font, edit Alt + F, selected Arial.
Vikki: If you'd like a refresher on selecting text, please see Hadley's instructional video entitled, "Selecting Text in Microsoft Word." In our combo box, we use our arrow keys to move through our font selections. Today, we'll choose AP font. A font that was developed by APH, specifically for low vision readers. It's available free of charge to qualified users for non-commercial purposes. Visit the American Printing House website at: www.aph.org, for more information.
Screen Reader: APHont.
Vikki: Before we select our desired font, let's discuss some of the other controls we have available to us in this open font dialogue box. When we press the Tab key, we move to the next control. A combo box for font style.
Screen Reader: Font style, edit Alt + Y, black.
Vikki: Our choices include, Regular, Italic, Bold, and Bold Italic. Please view the Hadley instructional video entitled, "Text Attributes in Microsoft Word," for more information about font styles. When we press Tab again, we navigate to a combo box which allows us to select the size of our font.
Screen Reader: Size, edit Alt + S, selected 12.
Vikki: As with the typeface, we can either type in our desired point size or use the arrow keys to navigate through the list. While the focus is on size, let's discuss another helpful keyboard shortcut. The command of Ctrl + Shift + P, also brings up the font dialogue box and places the focus in the size edit field. We won't use this shortcut today, but it's handy to remember when you wish to quickly change the size of your font. Let's type in 20 as our point size, then move to our next control with the Tab key.
Screen Reader: Two, zero, font color, text one button.
Vikki: We are now in the color control. Font color can be particularly helpful when we wish to draw visual attention to text. Black is the default font color but if wish to use color for emphasis, there's a wide range from which we can choose. By pressing the down arrow key we move to the color picker window. Let's do that now.
Screen Reader: Font dialogue, font color effects menu. Color picker window black, text one.
Vikki: We hear our screen reader announce the current font color. By pressing the down arrow once again we move into the color picker window. This is a menu that contains a variety of colors and shades of colors.
Screen Reader: Color picker list, Automatic and Automatic A.
Vikki: Our first selection is the default labeled Automatic. I'll press the down arrow key once again to move to the Automatic color, which as I said, is black. And then down arrow again to move to color themes.
Screen Reader: Theme Colors grouping, blue, accent one blue, accent one.
Vikki: The color picker window is laid out in a grid. Using the left, right, or down arrow keys we can move through various color themes and shades of specific colors. I'll press my arrow key several times to demonstrate.
Screen Reader: Blue accent one, lighter 80% blue. Orange, accent two. Orange, accent two. Gray 50%, accent three. Gray 50%, accent-- Gray 50%, accent three. Gray 50%, accent three, darker 50%, gray 50%.
Vikki: If we continue to press our down arrow key, we navigate to a row of colors labeled Standard Colors grouping. We use our left or right arrow key to move between the choices.
Screen Reader: Standard Colors grouping, light blue, light blue. Blue, blue, dark blue, dark blue, purple, purple.
Vikki: There are even more color choices with our final item under the color picker window. By using the down arrow we navigate to More Colors. We can open a new dialogue box by pressing Enter.
Screen Reader: More Colors, M, colors dialogue, colors. Current new, tab control standard.
Vikki: This dialogue box contains a graphic with various shades of colors. One can use the arrow keys to move between various shades, but the graphic itself is not accessible to screen readers. I'll close this dialogue box with the Esc key, and this returns us to the font dialogue box.
Screen Reader: Font dialogue, font color effects. Font color, text one button.
Vikki: Here with have other controls including Strikethrough, Subscripts and Superscripts from which we can choose. Let's Tab through these choices to the OK button, and press the Spacebar to execute today's selections.
Screen Reader: Underline style, Strikethrough checkbox, Double strikethrough checkbox, Superscript checkbox not checked, Subscript checkbox not checked Alt + B, Small caps checkbox not checked Alt + M, All caps checkbox not checked Alt + A, Hidden checkbox not checked Alt + H, Set As Default button, Text Effects, OK button. The "Declaration of Independence" Word.
Vikki: Screen readers allow us to determine what attributes have been applied to text with another keyboard shortcut. In NVDA we use the command of NVDA and the F key. We hear the selected text style, font, point size, color and attributes, such as bold, alignment and line spacing. Let's try that now. I'll place the insertion bar at the the beginning of our title, and press the NVDA key and F together.
Screen Reader: Style Normal, Web, APHont 20 pt black, bold, align left, line spacing single.
Vikki: The JAWS command to describe attributes is JAWS and the F key. With these helpful tips, we can use Windows shortcuts to customize font type, size and color in our Word document. I'm Vikki Vaughan, and I thank you for joining me today.
-
Handouts
Font Selection Quick-Start Guide (PDF)
This quick-start guide helps you customize the font in Microsoft Word documents.
Word with Screen Reader Series
- Video · 11 minutes

- Video · 6 minutes
- Video · 11 minutes

- Video · 10 minutes

Explore
-
The Blind Poet, Dave Steele
Audio · 20 minutes
-
I'm feeling overwhelmed
Resource guide
-
7 Helpful Tech Terms When You Have Vision Loss
Article · 4 minutes
-
Writers' Circle
Discussion
- Explore more
Join the Hadley Community
Hadley's resources are always available to you. Create a no-cost Hadley account to go further:
-
Pick up where you left off Everything you start is automatically saved across Hadley.
-
Personalized recommendations We'll suggest resources based on your interests.
-
Join live discussions Live and lively discussions on technology, cooking, and more, all geared toward the community of people living with vision loss.
-
Find peer support Connect with people who understand what you're going through.